DIY-ATNTFIU: Card Games - R32 Door Card Removal and Restoration Part 1
If you read my previous posts on
stripping the interior you may have been wondering about the two
major panels that I didn't discuss – the door cards. I did end up
removing both of mine but was waiting until I got a chance to give
them a long overdue refurbishing before posting more about them. I
finally had a chance to do that and so now I'll share with you how
(with the help of time, tools, and the arts and crafts skills you've
been ignoring since you were young enough to eat glue) your door
cards can look minty fresh again.
First off, you may be wondering what
the hell door cards are and why you want to mess with them. No, these
aren't the same kind of cards you use at the poker table or that
pimply kids who haven't discovered the wonders of girls wave around
at your local comic book store while shouting and gesticulating
wildly about using “Five mana to summon “Black Magic Bitch and
the Black Hearts” ”. Door cards are those big interior panels
covering your car doors that make for a logical place to put window
switches and door handles and hide all sorts of magical things like
speakers, power window mechanisms, or 10 pounds of cocaine (and the
cure for blindness). Because they hide all those wonderful things you might want
to dismantle them to get in there or to simply give the cards some
TLC.
 |
| This is a door card. |
In my car's case the door cards were in
fairly good shape except for a couple of small nicks in the vinyl but
the lining of the door pockets were fading like in a lot of other
Skylines and the speaker grilles had seen better days. In order to
best fix that and also install some swanky new speakers for mah toons
I took them off and lugged them back to the Fortress of Oliver-tude.
If you want to do the same the process
is pretty simple. Tool wise you'll just need a couple of simple
things:
- A Phillips screwdriver
- Some plastic panel poppers or a flathead screwdriver with the tip wrapped in tape
Start by opening the door you want to
work on. Obvious first step is obvious.
Now check out this diagram from the
service manual. It tells you everything you need to know...for the
driver's side. I guess the manual writers thought you didn't need a
separate one for the passenger side despite it being VERY
DIFFERENT!!! Lazy bums.
 |
| Service manual diagram for the driver's door card. If only there were one for the other side. |
First off, start by carefully prying
out the inside door handle escutcheon. The panel poppers or flathead
screwdriver can get you started then you can pull it off the rest of
the way with your hands.
 |
| Get it started with the panel popper then maneuver it the rest of the way with your hands. |
Next, pry up the power window
switchplates. On the driver's side you just pop the unit up and undo
the two connectors underneath then you can go ahead and separate the
switchplate. On the passenger side the connector is on a cable that
you can't get to until you actually pry the door card off so just
pull the switch back a bit – what's important here is getting
access to a screw that's underneath. That's the first difference in
the screws between the driver and passenger's side. Remove that screw
and set it aside.
 |
| The driver's side switch module can be removed entirely right away. |
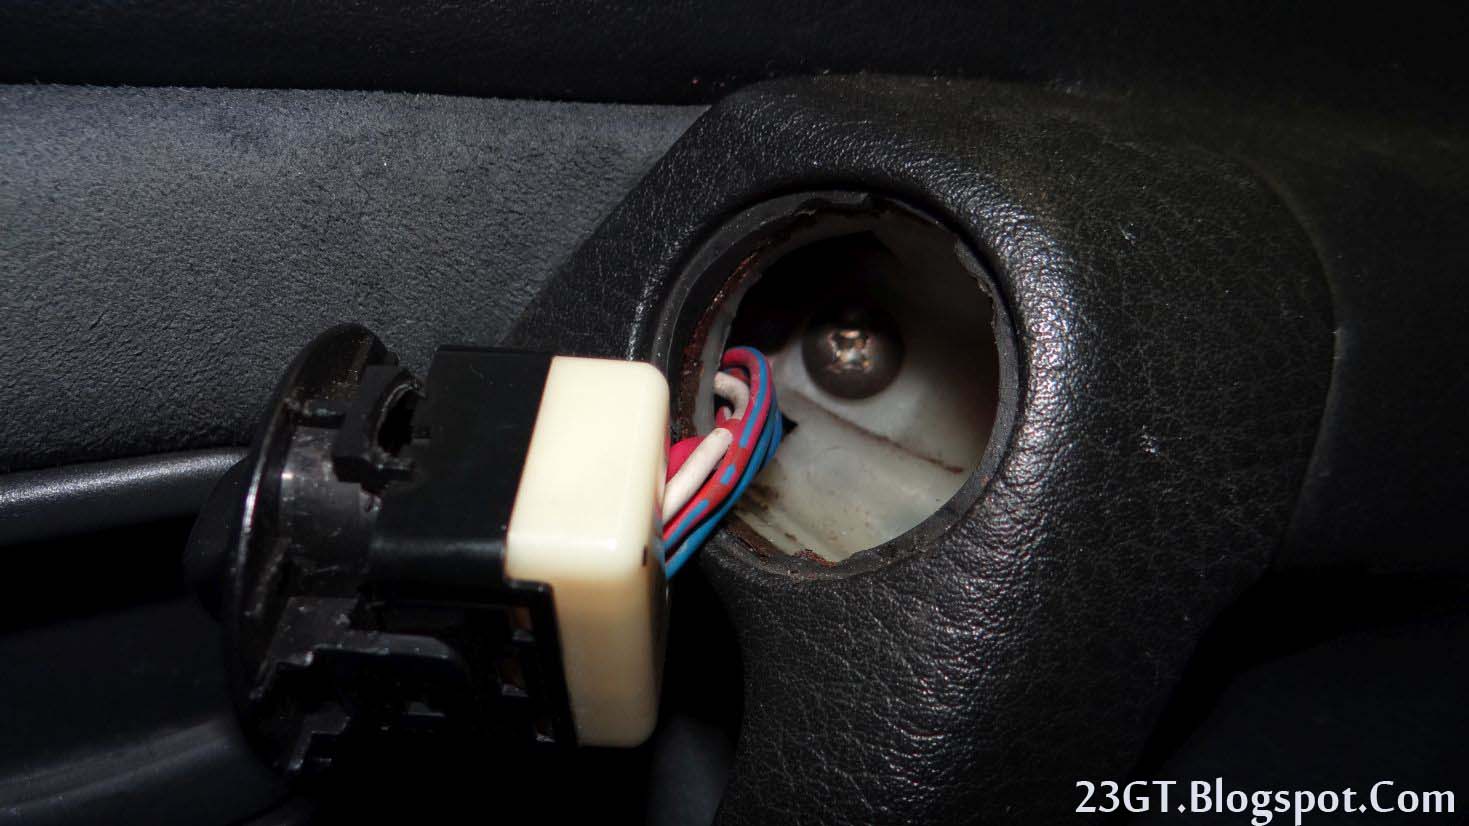 |
| On the other side you mainly want to just get to this screw that's hiding underneath |
After taking care of the switches look
into the door handle cup and you'll see a screw at the bottom. Undo that
one and then pry up and remove the plastic handle piece.
 |
| Undo the screw and pop this plastic piece right out. |
Going to the front of the door card
near the hinge you'll see two plastic caps that hide two more screws.
Pop the covers back and undo those screws.
 |
| Pop open the little cover that I'm holding here and undo the screw that's underneath. |
Switching to bottom edge of the door
card you'll find another three screws to undo. That's it for the
driver's side but on the passenger side there's one more screw
sneakily hidden and easy to miss if you don't know about it. Look
just below the angled grab bar (the one with the window switch) and
you'll find a little plastic panel about an inch across. Pop that off
and you'll find yet another screw.
 |
| There are three of these on the underside of the door card |
 |
| It's easy to miss this cutout on the passenger side door card that hides yet another screw under a plastic cover. |
Once you get all those sneaky screws
out you can now start pulling the door card off. It's held in by five
push fasteners – two on the front end and three on the back. Gently
pull on the edges until you can feel them pop off. The molding on the
upper edge of the door card wraps around the metal of the door frame
so once you have all the fasteners off pull up and the card should
come free. Make sure to undo the power window switch cable on the
passenger side before pulling the card off completely.
 |
| This is what you should end up with once all's said and done. |
With the door card off you can now
start checking out the speakers, the door locks, or whatever
contraband might have been hidden behind there.
If your car suffers from the common
ailment of crusty-looking interior door release handles and you want
to replace them now's a good time to do so. It's easy enough to do.
Start by undoing the screw securing the door release units. Then push
the whole unit forward slightly – they slide into two notches on
the door frame so you'll feel them come loose. There are two metal
bars you then have to undo. The top one is held on by a little
plastic tubular catch. Stick a finger around the back side and you'll
feel the clip that wraps around the top – pull on that and it
should come free. The top and bottom bars can then be detached by
pushing up to get the bent ends out of the holes they slot into.
Putting in the replacement pieces is simply the reverse of the above.
 |
| The inner door handles are easy to remove. Just yank 'em forward and pop off this clip first. |
 |
| Unlatch the rods and the whole unit just comes off. |
Now, as I mentioned my door cards
needed some TLC. If your door cards are facing the same situation and
you want some ideas on how to clean them up so your date stops
picking on them all the time, I'll try to help you out in part 2.
Important
disclaimer: Understand that working on your car can be inherently
dangerous. This is meant to be a guide only and does not take the
place of common sense and proper safety precautions. Only you can
ensure your own safety. Know your limits and ask for qualified help
if you're unsure of something. Every time you act stupid in the
garage...God kills a Miata.

Comments
Post a Comment