DIY-ATNTFIU: R32 Interior Removal Part 1 - Ejecto Seato Cuz!
Okay, so today we'll start a multi-part
DIY to help people interested in refurbishing their R32's interior.
It's a 25-year old car so almost certainly there'll be something
you'll want to tidy up like the seat upholstery, the carpet, or maybe
you have the infamous bubbled dash? I'll discuss removing all of that
so you can fix them up or just dispose of it all in order to turn your car into
a mad stripped-out race car yo.
 |
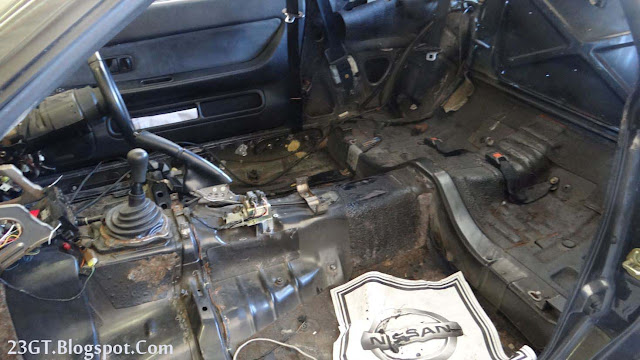
| Follow this interior removal guide and you'll end up with this - a whole lot of added lightness. |
 |
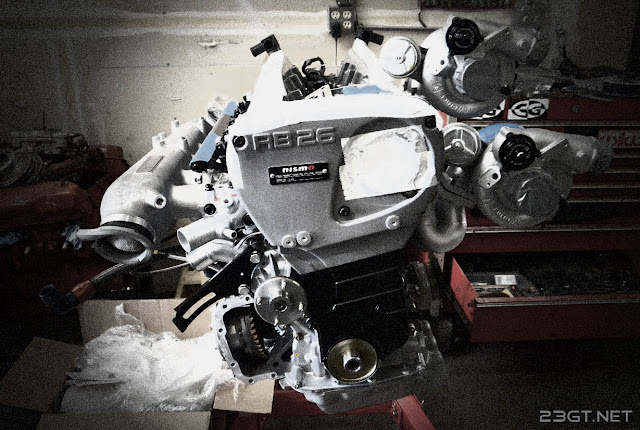
| And you'll have all of this littering your garage. |
To make it more manageable I'm going to
break this up into three parts – first, we'll remove the seats.
This part will come in handy later on when I post about refurbishing
them. In part two I'll talk about removing the dash and door
trim and in part three we'll deal with the carpet, seatbelts, and
rear section.
So, the seats. This part is actually
fairly easy and just needs a few tools.
- A socket wrench set
- Some plastic panel poppers (if you don't know what these are, here's a link for an example: http://www.harborfreight.com/5-piece-auto-trim-and-molding-tool-set-67021.html)
- An old blanket or a mover's blanket
- Maybe a pry bar or modified flathead screwdriver (more on that later)
- One liter of synthetic elbow grease
Okay, let's start with the front seats.
OEM front seats are attached the same way in almost all modern cars
whether it's my R35 GT-R or my R32. Generally it's four bolts on each
corner attaching the seat rails to the floor pan but some details may
differ.
 |
| This helpful diagram from the service manual outlines the bolts and nut plus the tightening torques once you're ready to reinstall. The torque numbers are in N-m, kg-m, and ft-lbs. |
You can start with the driver or the
passenger seat but either way you first want to move the seat back
all the way on the sliders for easy access to the front bolts. If
your seats haven't been messed with the bolts will be covered by
little plastic covers. Just pop those off with your panel poppers and
set them aside.
Once the covers are off, grab a 14mm
socket and go to town on the two front bolts.
After undoing the front bolts, slide
the seat forward to get the rear portion. Hit the recline lever to
tilt the seatback forward for easier access. In the rear there's one
bolt on the outboard rail but the inner rail is attached by a nut to
the transmission tunnel. Same process as the front basically - remove
the plastic covers, and go to work with your socket wrench.
 |
| Red circles show the three bolts and one nut for the driver side seat. White circle is the seatbelt receptacle plug. |
Now that you've undone the rails don't
try to pull out the seats yet. First you want to look under the seat
and find the connector for the seatbelt socket. Undo that plug
first or you'll do something you'll regret later.
Once the plug is undone there are still
a couple of little steps you'll want to do to get ready for seat
removal. First, slide the seat into the middle of the sliders so it's
easier to maneuver. No need to have the rails sticking out and
scratching shit up. And speaking of scratching shit up you'll want to
next put the blanket I mentioned earlier on top of the doorsill. This
helps prevent accidentally scratching your sills with those nasty
metal rails and it keeps your doorsills warm and cozy and shows them
you care.
After getting ready, break out some of
that synthetic elbow grease and lift the seat through the door while
channeling your best Drax the Destroyer impersonation. Keep the
seatback tilted forward so that it makes for a more manageable
bundle. The stock R32 seats are pretty easy to move since they're
light old school manual units. Try removing an R35 OEM seat with all
the electric motors and airbags it has that make it weigh more than a
slab of depleted uranium and you'll never skip going to the gym ever
again. I know my back hurts just remembering that ordeal.
So, congrats, you've just removed your
R32's front seats! Now, this next step is VERY important. Get into
the car and sit in the back seat. Hold your socket wrench tightly in
your right hand and stretch out your legs as far as they'll go. Close
your eyes. Feel the awesomeness of all that legroom now that your
front seats are gone!
Maybe you should leave the front
passenger seat out and hire a driver? Yeah, R32 limo – wouldn't
that be the bomdiggidy?
Enough crazy talk, let's move on to
defenestrating the rear seats.
Okay, the rear bench is in two parts –
the bottom cushion and the seatback. You can remove either one first
with some effort but it's easier to do the bottom to start with.
 |
| Another diagram for you from the service manual. You probably won't have the fancy center armrest thingy though. |
The bottom is held on only by two clips
on the front edge. Undoing them can range from very easy to
wanting-to-light-them-on-fire hard depending on whether someone has
removed your seats before or not. If you're lucky like me and someone
has taken out your seats before then a good yank up on the front of
the cushion should be all you need to get the clips to release. If
you're unlucky then you may have to break out a pry bar and carefully
nudge the cushion out using more synthetic elbow grease while
whispering desperate pleas to it or you may want to get creative and
read this suggestion from a Skylines Australia poster:
 |
| I've circled the two clips for the rear seat bottom in this image. |
Once you get those wonderful clips
undone then it's just a matter of tugging the cushion forward and
chucking it out one of the doors.
The seatback is fairly easy. On both
sides of the bottom edge you'll see a metal u-shaped projection that's
attached by a 10mm bolt to the rear bulkhead. With the bottom
cushion in place the bolts are covered up but they can be reached if
you push the cushion down. Just undo those with your socket wrench.
 |
| Here's the location of the left side bolt for my rear seatback. Your bolt will probably look different because my stock ones were missing thanks to the previous owner. |
Besides the two bolts the seatback is
attached to the bulkhead by three hooks that grab the seat's metal
frame. You'll want to push the seatback up to get it off the hooks
and it should then be free for you to chuck out the door in the same
manner as the bottom section.
 |
| The circles show where the three hooks for the seatback are. The leftmost one in the picture isn't visible because of the shadow but is located in that area. |
Woohoo, you're done! Now go have some
popcorn or something to celebrate. Or once the next part of this guide is up you
can proceed to dash removal if that's what floats your boat.
Important
disclaimer: Understand that working on your car can be inherently
dangerous. This is meant to be a guide only and does not take the
place of common sense and proper safety precautions. Only you can
ensure your own safety. Know your limits and ask for qualified help
if you're unsure of something. Every time you act stupid in the
garage...God kills a Miata.


Comments
Post a Comment